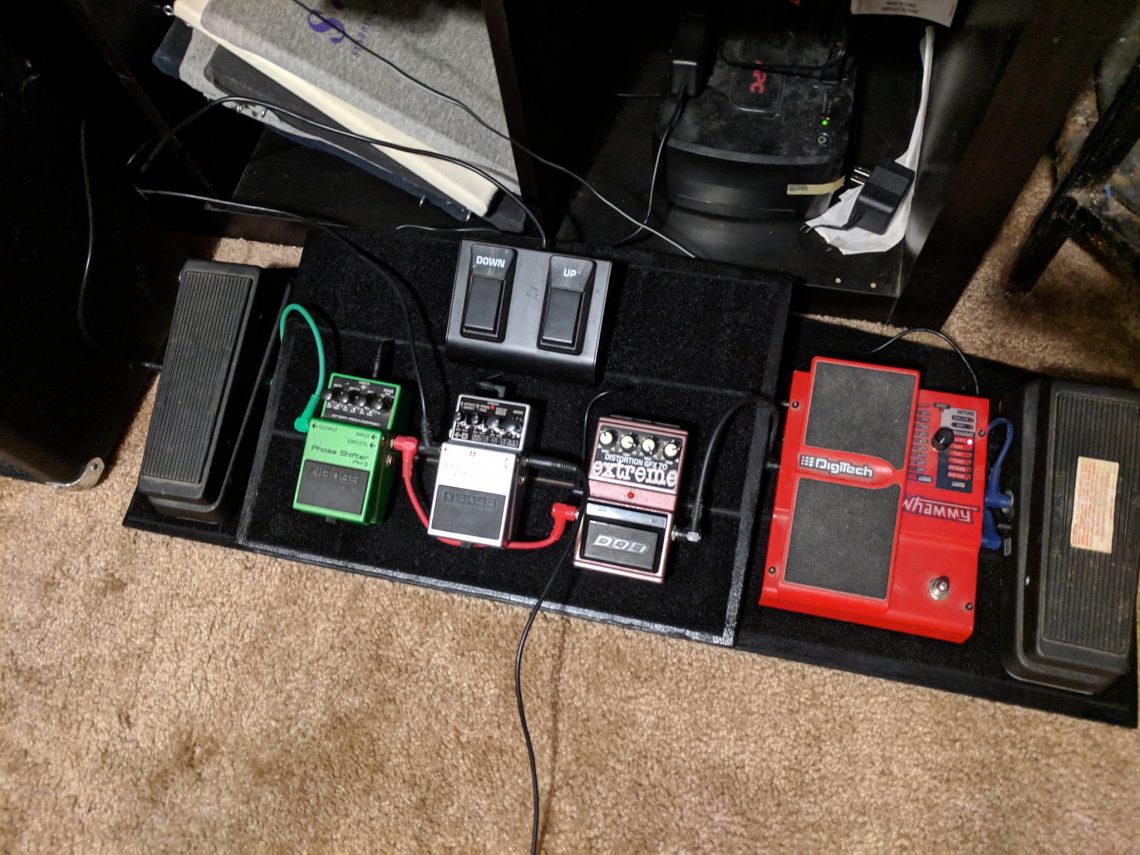
Guitar Effects Pedal Board
 For many years, I’ve had these effects pedals just sitting on the floor. Then my robot vacuum would move them around. It was super frustrating, but pedal boards are expensive. So I decided to make my own.
The supplies needed are some plywood (I went with half inch plywood, because it seemed sturdy enough and went with 2 feet by 4 feet, because that’s all I’d need), some glue, clamps, black paint, velcro, and a an optional power switch.
 The process is pretty straight forward. I knew I wanted there to be a second “shelf” that was on an angle, for comfort. For a design element, I wanted the edge facing away from me to have a slight curve. First, I took my plywood and cut off 16 inches from the end. That would give me 16 inches by 2 feet for the upper shelf. Then, on the remaining 32 inch piece, I cut it off 3 inches from the top, and another 3 inches after that. Now we’re left with four pieces. 3 inches by 32 inches X2, 32 inches by 18 inches, and 16 inches by 2 feet.
I took one of the 3 inch pieces and glued it to the bottom of the larger 32 inch piece. This elevated it slightly. Imagine it as a heel for the base. Next, I traced out a slight curve along the end with the heel. I used a jigsaw to cut that out. Once that was done, I took the upper shelf part, laid that down on the bottom piece, and traced a matching curve. I knew that I wanted my effects to be in a certain order, so I did plan that accordingly.
Once all of the pieces were cut out, I sanded the edges. The remaining 3 inch piece would be a vertical stand to hold up the upper shelf. So I cut that down to 2 feet, but didn’t need to sand anything. I also cut a few holes in the upper ledge, so I could feed wires through.
 The next step was to paint it black. I knew that I was going to cover most of it with velcro, so I only had to paint the edges.
Now, if I had thought this out more, I should have added a hinge where the upper shelf met the lower board. That would have made it easier to access the built in power supply.
Oops.
Once the paint and clear coat were dry, I started adding the velcro. I got some 5 inch wide velcro strips that were super duper adhesive. I covered most of the pedal board with that, so that I could rearrange my pedals later if need be. For the wire holes, I cut “x”s in the velcro, so I could feed wires through, but the hole wouldn’t be too visible.
 On the vertical piece, I drilled a hole for some wires, and a hole for the power button. Now it was time to glue everything together. I ran out of clamps, so I had to use a locking wrench, but it worked.

Then I took the power cord for the power supply, and spliced the power button into it. I mounted everything. In my case, feeding the wires through was a pain in the ass, because I didn’t install said hinge. Learn from my mistake.

And we are finally done.


